


Once you’ve bought, borrowed or stolen your first saxophone, the easy part is done! And now the true saxophone journey begins. Getting a sound out of it. Finding your way around all those keys. And, eventually, playing the music that made you want a saxophone in the first place.
I’m Florian Rooz. In these free lessons I’ll take you through the first steps: putting your horn together, playing your first notes and getting the fingerings into your head and hands. You can follow along on alto or tenor saxophone. You don’t need to read music to begin.
Already looking for the book, video lessons and visual charts to practise with? You’ll find them in my Hello Saxophone Starter Pack.
How hard is it to learn to play the saxophone?
There is quite a difference between making your first music and mastering an instrument. You don’t have to wait until you’ve mastered the saxophone to enjoy playing it. Otherwise we’d all be waiting a very long time.
There are a few things to get used to at the beginning: how you hold the instrument, how you use your lips and air, and which fingers go where. Give each of them some attention. It is much easier to build on a comfortable start than to spend your practice time fighting the instrument.
In this video I explain what to expect, and where the effort goes.
Start here: choose one small thing you want to be able to do today. A steady note is a perfectly good first achievement.
Step 1: Put your saxophone together and make your first sound
Before we get carried away with solos, let’s get the instrument ready. Your reed, mouthpiece, neck strap and playing position all deserve a little attention.
The way your lips meet the mouthpiece is called your embouchure. It’s an unfamiliar word for something you’ll be using every time you play. Follow the demonstration below, with your own saxophone in your hands. Pause it whenever you need to.
Try it: play one comfortable note several times. Listen to the start of the sound and see whether you can keep it steady. Take breaks, and avoid squeezing harder and harder to force a note out.
If something refuses to work, go back through the setup in the video. The answer isn’t always to blow harder!
Step 2: Learn the saxophone fingerings with a picture you can understand
Look at a piano and you can see the notes lined up from low to high. Look at a saxophone and you see a rather impressive collection of keys, rods and little flaps. Where exactly are all the notes hiding?
This is why I created my piano-style saxophone fingering chart. It shows the fingerings in the order of the notes, laid out like a piano keyboard. The aim is to build a mental picture of the instrument, so you’re gradually finding notes rather than guessing at keys.
If you’ve arrived here from my chromatic-scale video, this is the exercise and chart method you were looking for. You can follow the visual fingerings in the lesson below; the Starter Pack includes charts to use alongside your practice.
A chromatic scale moves through the notes one semitone at a time, without skipping any. It gives you a way to explore the instrument in order.
Try it: start with a short section you can play comfortably. Say the note names, play slowly, then come back down. Add more notes as that section becomes familiar. The whole range can wait; this is an exercise to grow into.
Both alto and tenor use the same basic fingerings for written notes, although the sounding pitches differ. For playing along with music, use the version intended for your instrument.
See the Starter Pack with the book, video lessons and charts →
Step 3: Start making music with the notes you know
You don’t need to finish every scale before you try a melody. Pick a short musical phrase and explore it. Play it slowly enough that you can hear what you’re doing. Repeat the awkward bit on its own, then put it back into the phrase.
Keep some time for exercises and some time for music you enjoy. Getting your fingers organised is useful. Remembering why you wanted to play in the first place is useful too.
You’ll find song lessons and more exercises on my Hello Saxophone YouTube channel.
A simple practice plan for your first week
Here is a starting point, not an exam. Repeat a day whenever you need to.
- Days 1–2: get comfortable assembling and holding the saxophone. Follow the first-sound lesson and practise a steady note.
- Days 3–4: work on a small group of fingerings. Move between the notes slowly, using the chart and video as your reference.
- Days 5–6: practise a short section of the chromatic scale, ascending and descending. Keep listening to your sound.
- Day 7: revisit what you’ve learned and try a simple melody or phrase. Notice what has become easier and choose the next thing to work on.
Try a manageable session of around 10–15 minutes, with rests as needed. Stop before tiredness turns into forcing. You can build up your practice as playing becomes more comfortable.
Want the full Hello Saxophone Starter Pack?
These free videos give you a place to begin. If you’d like my written explanations and visual references alongside the lessons, that’s what the Starter Pack is for.
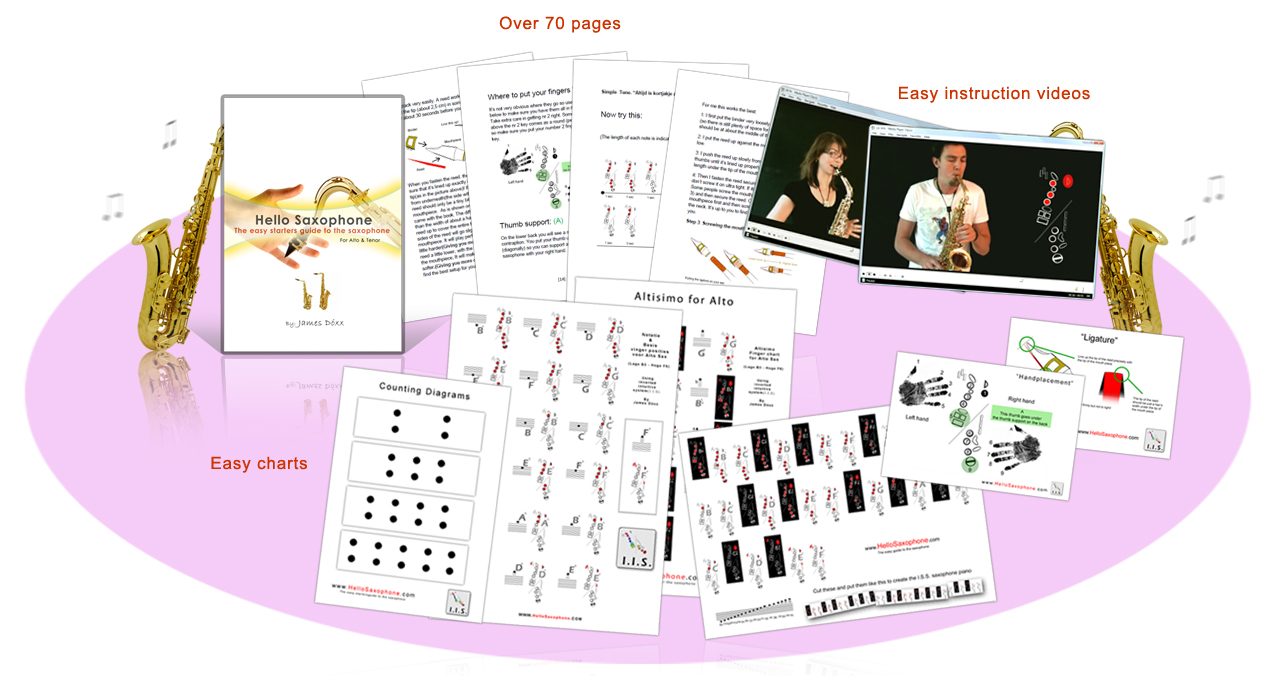
The core package brings together:
- The Hello Saxophone ebook: a practical guide you can work through and return to when you need an explanation.
- Video lessons: demonstrations to watch while you learn.
- Visual fingering charts: references to help you connect the notes with your fingers.
It’s designed for adult beginners, including those starting without music-reading experience. You can see the current package contents, included extras and price on the product page.
Whether you begin with the free lessons or join me for the full guide, get your horn out and give it a go. Fast, fun and frustration free. That’s the idea!
Florian Rooz — Hello Saxophone